Showing posts with label Baked Goods. Show all posts

Sunday, April 8, 2012

Purple Bunny Birthday Party


I was thinking and thinking and couldn't come up with a theme for my daughter's 4th birthday party.  I finally thought to do a Bunny Party.  Olivia really likes bunnies, even her must-have stuffed animal for bed time is a bunny she received shortly after her birth from her godmother Barbara from BKluge Photography, located in Halifax.  I searched for bunny cakes on Pinterest, as I wanted to try something different than piping one, this year and finally came across this awesome Blog Post.


My friend Lila from Sweet and Lovely Crafts (she has an AWESOME BLOG, don't miss out on it!) sent me this link on how to make these Bunny Ears - this is what we used instead of party hats.


So, here is what I did for our little girl's 4th birthday party.  Let's start with the cake.  I made the Cookies & Cream Cupcakes recipe, and used it for this cake, as it's a really nice treat.  Since I only had half the Oreo Cookies I needed, I used half Oreo Cookies and half Golden Oreos and we loved the cake.


I used a stainless steel bowl from a regular Kitchen Aid Stand Mixer for the top part of the cake and a 9" cake pan for the bottom part.  I made the amount of the recipe above and before I poured it into the pan and bowl, I put two stripes of parchment paper into each pan, so they overlapped and made an X for easy removal.  I also greased the pans before I put in the batter.

Once I was done putting the batter into the round cake pan, I put in the Oreo and Golden Oreos (only half the cookie with the centre on it), alternating, until the whole top was covered.  I then pressed all the cookies down a bit further into the batter and smoothed the batter over top as much as I could, as I wasn't sure if they would burn, if left uncovered.  I think that was actually my favourite part of the cake - the way the bottom of it tasted, thanks to the cookies!


So when taking the cakes out of the oven, I turned the one from the cake pan and upside down.  Then I trimmed the top part of the cake from the Kitchen Aid Stand mixer (and by the way, this one took a loooong time, to actually be baked).  Then I turned that upside down as well and set it on the other cake, putting a generous layer of frosting in between.

Next, I frosted the whole cake with a nice layer of frosting, trying to form somewhat of a neck and head.


Next, I attached two little muffins with tooth picks as the bunny's nose and cut two little teeth out of a white marshmallow.  I cut the nose out of another piece of white marshmallow (because I couldn't find any pink ones) and put pink hearts on it, to make it look pink.  I also cut two little eyes out of licorice. 


You could also use this kind of licorice, if you want to make your bunny look a bit crazy! ;)

My dear husband made the bunny ears that we only stuck in the bunny the next morning.  He made them out of white bristol board and pink paper, making a pocket with the white paper, so he could stuff a pipe cleaner in between, so the ears can be bent.  Make sure you let some pipe cleaner stick out of the bottom, so you can easily stick it into the cake.  To finish off the bunny, I gave the neck of the bunny a bit of colour - purple of course!


One of my favourite parts of the cake were the sparklers!  Unfortunately we weren't smart enough to have one person light them on the right and simultaneously another person light them on the left side and therefore the right side finished sparkling before the left side even began, but it was still cute. :)


We made these Toilet Paper Roll Bunnies that were fairly quick and easy.  Though, as you can see from the picture, I forgot all about the cotton ball tail - shame on me!


The kids made a Bunny craft and a Candy Necklace.  For the Candy Necklace I bought purple laces at the Bulk Barn, Fruit Loops, Marshmallow Bunnies and Candy with a whole in the middle.


After that, the kids had Bunny Peanut Butter and Jam sandwiches and Bunny Fruit Kabobs with Vanilla yogurt dip for lunch.  

Picture (c) of Lila from Sweet and Lovely Crafts

The Bunny Fruit Kabobs included bunnies out of water melon, melon and cantelope.


I'm happy to say that Olivia very much enjoyed her Purple Bunny Party for her 4th Birthday.  If anyone tries out any of these ideas, especially the cake, please let me know how it turned out, as I would love to get your feedback.

Friday, November 18, 2011

White Chocolate Brownie Cake


This post was meant to go up in July, but alas, it's here now.


I needed a simple birthday cake idea for my 2nd daughter's first birthday party.  It needed to be simple.  We were going to the U2 Concert in Moncton, NB, Canada the next day and then were having the birthday party on July 31, 2011, the very next day.  It takes 2 1/2 hours of just driving time to get home from Moncton and it took a long time for 80 000 people to get down from Magnetic Hill and on the road.  We were exhausted the next day, that's for sure.  


I went on my Sweet Treats board on Pinterest (which any of you should join, because it's FREE and amazing - you can follow me, just click on the "Follow Me on Pinterest" button on the top of this blog) and found the White Chocolate Brownies Recipe that I've wanted to try for some time now.  This was the perfect excuse!  The recipe was found here and I just doubled it to make more of it, so I could put it in a round form to make the cake.  The recipe below is adjusted for my cake, but you still have to double it!

Prep Time: 15min
Cook Time: 33min

Ingredients
125g butter, chopped
250g white chocolate chips
1/2 cup brown sugar, firmly packed
2 eggs, lightly beaten,
1 1/4 cups plain flour, sifted

Use a 9 inch cake pan.  Generously spray with non-stick baking spray or line with paper cases.  The oven should be preheated to 160 C (325 F).
1. In a microwave safe bowl heat the chopped butter on high for 30 seconds. Stir, then repeat for another 30 seconds - the butter should be melted. Add the white chocolate and heat for another 30 seconds. Remove and stir until blended. You may need a further 20 seconds. Stir until smooth. Cool slightly so that you do not cook the eggs when you add them.
2. Add the brown sugar and the beaten eggs.  Stir through.
3. Add the sifted flour and stir through until smooth.
4. Bake in a preheated oven set to 160 C (325 F) for 33 minutes.
5. Remove from the oven and leave to cool in the pan for 10 minutes before removing to a cake rack to cool completely.  Lift out carefully.
6. Store in an airtight container for one week. The white chocolate brownie cake can be frozen for up to two months.


I thought the cake turned out quite nicely but it was very dense.  If you make Brownies, they might be less dense, but I'm not sure.  I guess I'll just have to try it sometime! :)
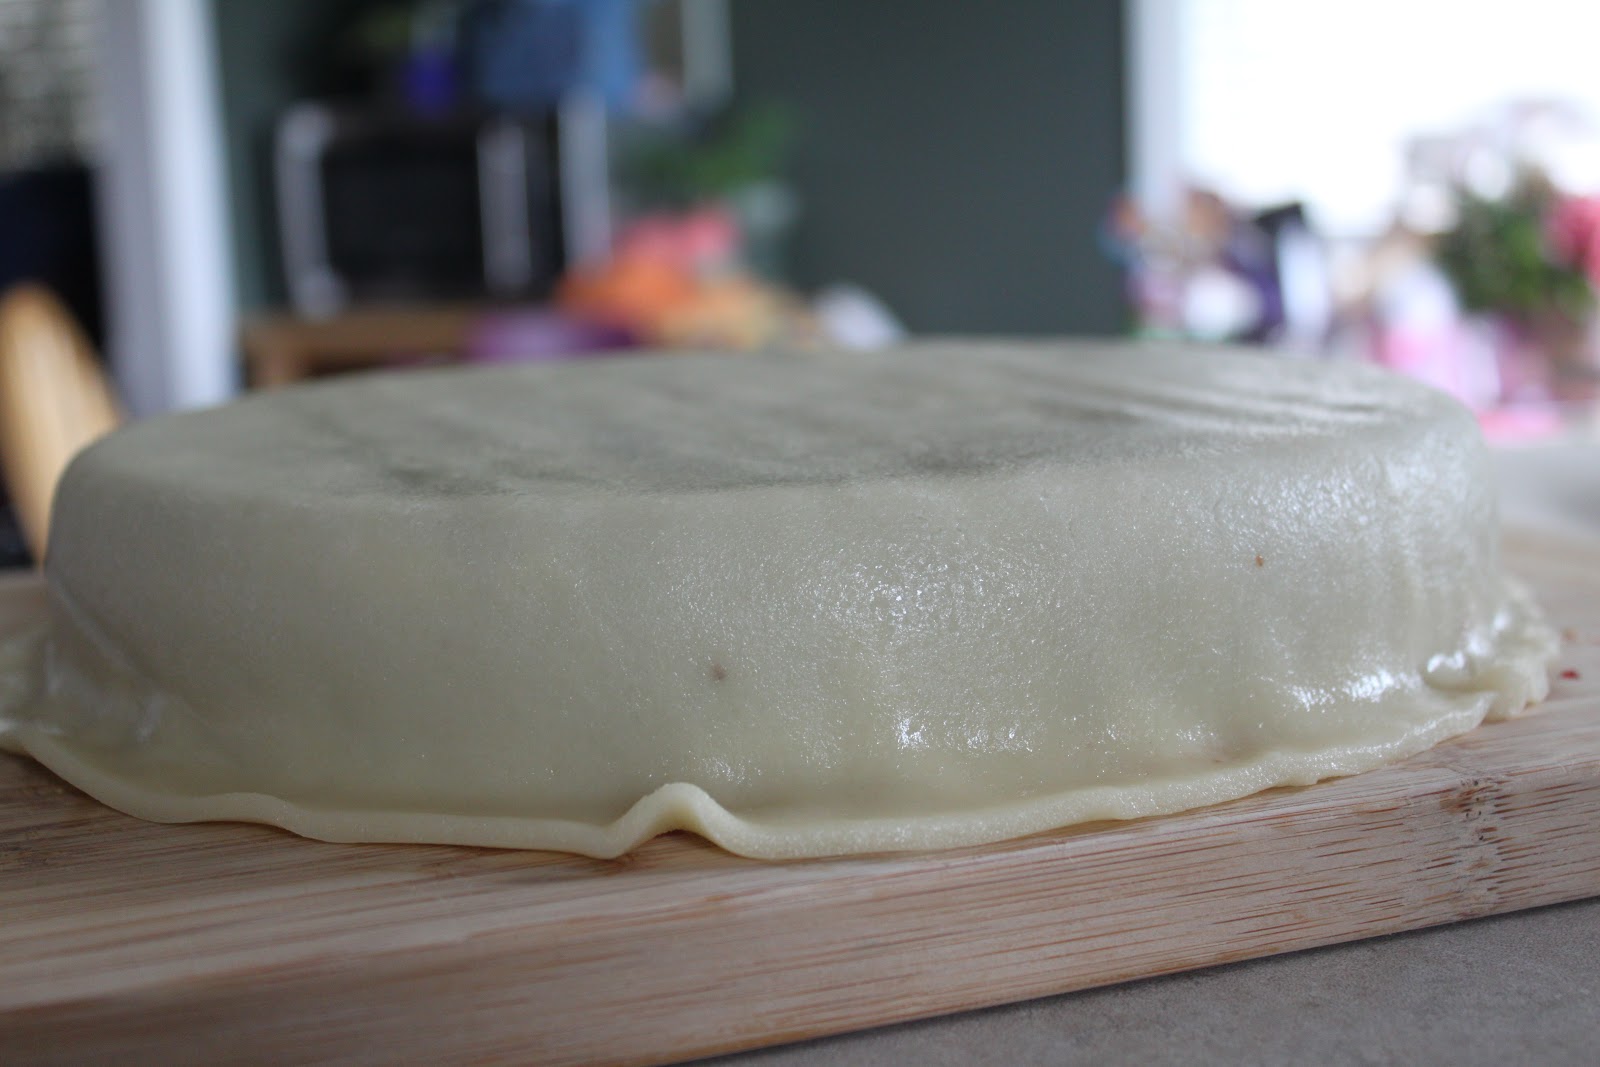
For the decoration of my little girl's first birthday cake, I used Dr. Oetker Ready Rolled Marzipan, that I picked up at our Specialty Food Store in Bedford, NS called Pete's Froutique.  They only carry it around Christmas time.  If you're lucky enough to live in the UK, you can buy it online here or they might carry it in Tesco etc.  You can google how to make Marzipan, too - it's quite simple.  Here are the instructions from the Ready Rolled Marzipan on how to put it on the cake:
1. Turn cake upside down for a smoother surface and place onto cake board.


2. Use a knife to thinly cover the cake with cool boiled jam (I used Raspberry jam).


3. Roll out marzipan (this was not part of the instructions, as it was already rolled).


4. Carefully fold disc in half around inner tube (or on your rolling pin).
5. Holding the ends, lift disc, placing it over the centre of your cake.


6. Smooth marzipan over top of the cake and carefully pull out folds while smoothing down sides.


7. For a perfectly smooth finish, cut out any folds with a knife and mooth the joins tongether until they blend.
8. Trim off excess around the bottom of the cake with a sharp knife to give a smooth finish.


9. Smooth surface with palm of your hand.


I had purchased a Carebear Edible Image from Ebay months ago and was ready to use it.  Unfortunatley it wouldn't come off the baking paper it was on (even though it was supposed to easily come off), so I really wouldn't recommend it.  I just stuck it on the cake, decorated over the torn spots that happened when we tried to pull the image off, took some pictures and then took the image off again and enjoyed the cake. :)  


If you try to make your own marzipan and roll it, please drop me a line and let me know how it turned out.  Let me know if you ever try the White Chocolate Brownies, and be sure to refer to the original Brownie recipe in the link above, as I've left a couple of ingredients and steps out for the cake!


Linking up with Skip to My Lou

Monday, July 25, 2011

Cookies & Cream Cupcakes


I decided to make Cookies & Cream Cupcakes for my daughter's first birthday.  I've had them on my Sweet Treats board on Pinterest (feel free to follow me!) for a little while and was really excited to try them.  I think cupcakes are perfect for a first birthday.  I found them on this great blog here but the actual recipe is here.


Makes 24 cupcakes

Cupcakes:
24 Oreo halves, with cream filling attached
2¼ cups all-purpose flour
1 tsp baking powder
½ tsp salt
8 tbsp unsalted butter, at room temperature
1 2/3 cup sugar
3 large egg whites, at room temperature
2 tsp vanilla extract
1 cup milk
20 Oreo cookies, coarsely chopped (I quarter them)

Frosting:

Decoration:
Oreo cookie crumbs
24 Oreo cookie halves (I quarter them)

Preheat the oven to 350˚ F.  Line the walls of two cupcake pans with 24 paper liners.  Place an Oreo halve in the bottom of each liner, cream side up.  


In a medium bowl, combine the flour, baking powder and salt; stir together with a fork to blend and set aside.  In the bowl of an electric mixer, combine the butter and sugar and beat together on medium-high speed until light and fluffy, about 2 minutes.  Blend in the egg whites one at a time, beating well after each addition.  Blend in the vanilla extract.  With the mixer on low speed, beat in half of the dry ingredients just until incorporated.  Add the milk and beat just until combined, then mix in the remaining dry ingredients. 


Gently fold in the chopped Oreos with a rubber spatula until evenly incorporated, being careful not to over-mix.


Evenly divide the batter between the prepared cupcake liners.  


Bake for 18-20 minutes, rotating the pans halfway through baking, until a toothpick inserted in the center comes out clean.  Allow to cool in the pans 5-10 minutes, then transfer to a wire rack to cool completely.


Frost the cooled cupcakes as desired.  Sprinkle with Oreo crumbs and garnish decoration with Oreo halves or quarters.   


These cupcakes turned out absolutely delicious.  My favourite part of them was the bottom (half the oreo cookie with the cream part on it).  I will definitely be making them again!


Linking up with Skip to My Lou

Tuesday, July 19, 2011

Healthy Baby Cereal Cookies

Thanks to Chez Lisa: Quest for Favourites for the great picture!

So, I've made these cookies several times already and the kids and adults (adults that don't mind eating healthy snacks, that is) love them alike.  I made them several times for my friend, when he was in the hospital with cancer, because he wasn't allowed any sugar, so this recipe was perfekt.  I found the recipe on my friend Crystal's blog here.  The cookies are not only healthy but also really simple & quick to make, which is always a plus for a mommy, right?  Please find the recipe below:

Baby Cereal Cookies

1/2 cup butter, margarine or oil
1/2 cup sugar or fruit puree
2 tsp vanilla
1 egg, beaten
2/3 cup flour (white or whole wheat)
2/3 cup infant cereal
1 tsp baking powder
pinch salt
2 tbsp coco powder (optional)


Preheat oven 375 degrees. Grease baking sheets, use parchment paper or silicone sheets. Beat butter and sugar/puree. Slowly beat in vanilla and egg. In separate bowl, mix all other ingredients. Slowly incorporate into butter mixture. Spoon cookie mix onto baking sheets. Cook 10 minutes. 

Thanks to Chez Lisa: Quest for Favourites for the great picture!

I usually have to bake my cookies for about 15minutes instead of the 10 minutes it says in the recipe and love it when they get a crunchy bottom to it.  I like using the Beechnut Multigrain Baby Cereal (my parents stocked me up from their visit to the States, as we no longer have Beechnut in Canada - DARN!) and Apple Puree.  I've also made the cookies with butternut squash, sweet potato and carrot puree.  I omit the coco powder and salt.

Hope you enjoy as much as we do!


Linking up with Skip to My Lou, Chez Lisa: Quest for Favourites
Related Posts Plugin for WordPress, Blogger...